
1. Shelters Module Entry
Shelters Module Workflow
This article is designed to help guide HMIS users through the basics of entering clients into their projects using the Shelters module of WellSky Community Services. This article has been written to generalize the process used by all shelters utilizing any assessment type (HUD, Standard, RHY). Assessment type is determined by FUNDING SOURCE. It is important to know that there will be some nuances to overall data entry based on project type and assessment type. For additional assistance beyond this workflow article, please contact the ICA Missouri Helpdesk.
Shelters Entry
Before entering any information into HMIS, projects must discuss and complete the HMIS Client Informed Consent to Share and Release of Information with each Head of Household.
IMPORTANT STEP! Select appropriate Enter Data As provider after first logging on!
View Shelter Inventory
- Click on Shelters from the menu on the left
- Select correct Unit List and click Submit
- Click Check Client In or View All
- Find the open bed where you're going to put the Head of Household and click on the Check In button (bed with green plus sign)
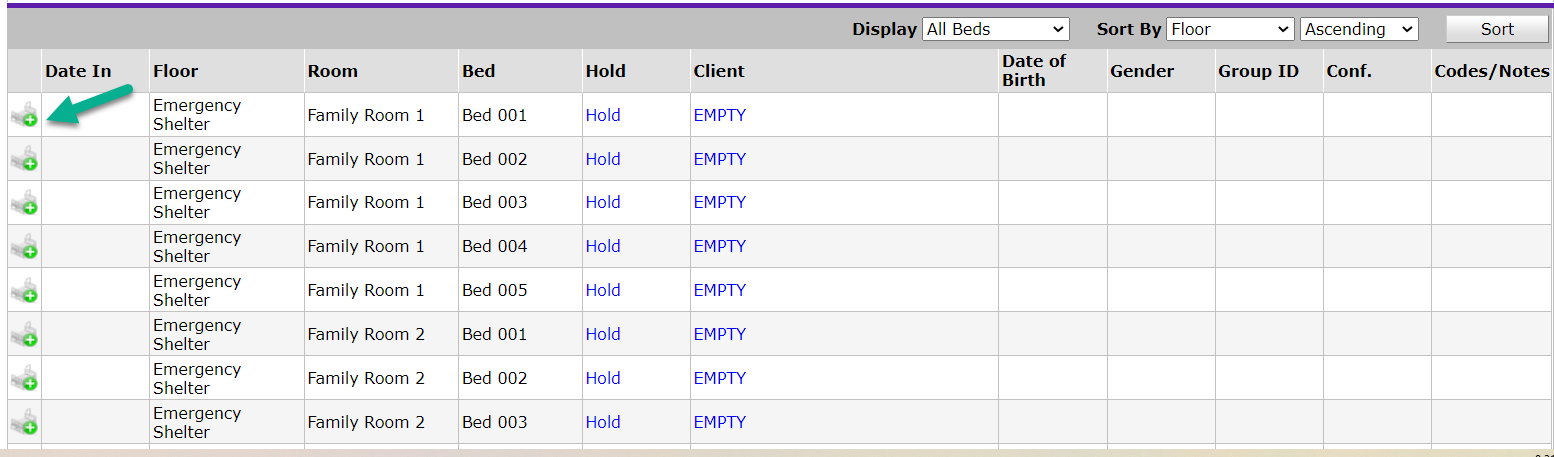
-
Client Search
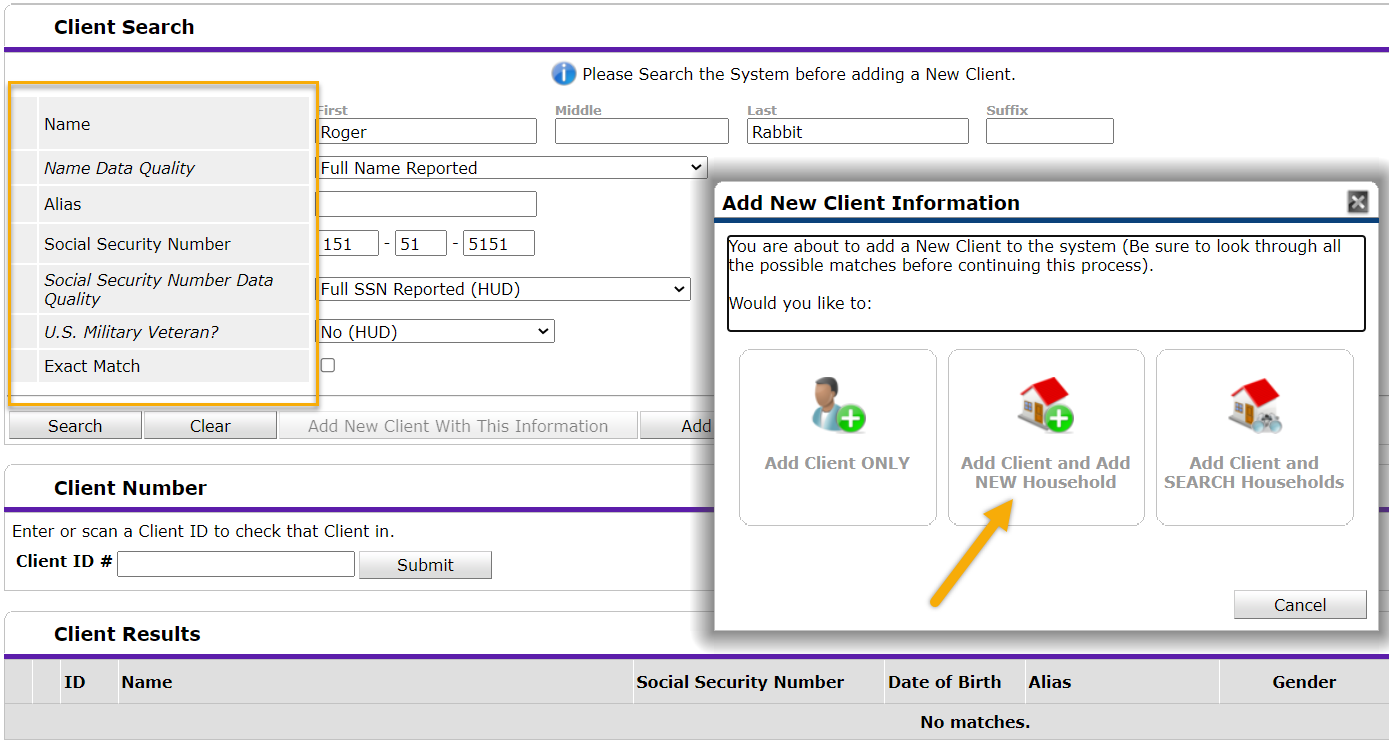
- Enter Head of Household's Name, Name Data Quality, SSN, SSN Data Quality, and U.S. Military Veteran status. Optional: Enter nickname in Alias
- Search
- If a match is found, confirm the details match the client's name, date of birth, and social security number. If it is the same person, click on the green plus to the left of the client name,
- If no matches are found, verify all information listed is correct with proper capitalization, click Add New Client with This Information
- On the popup, click Add Client and Household (even for single persons)
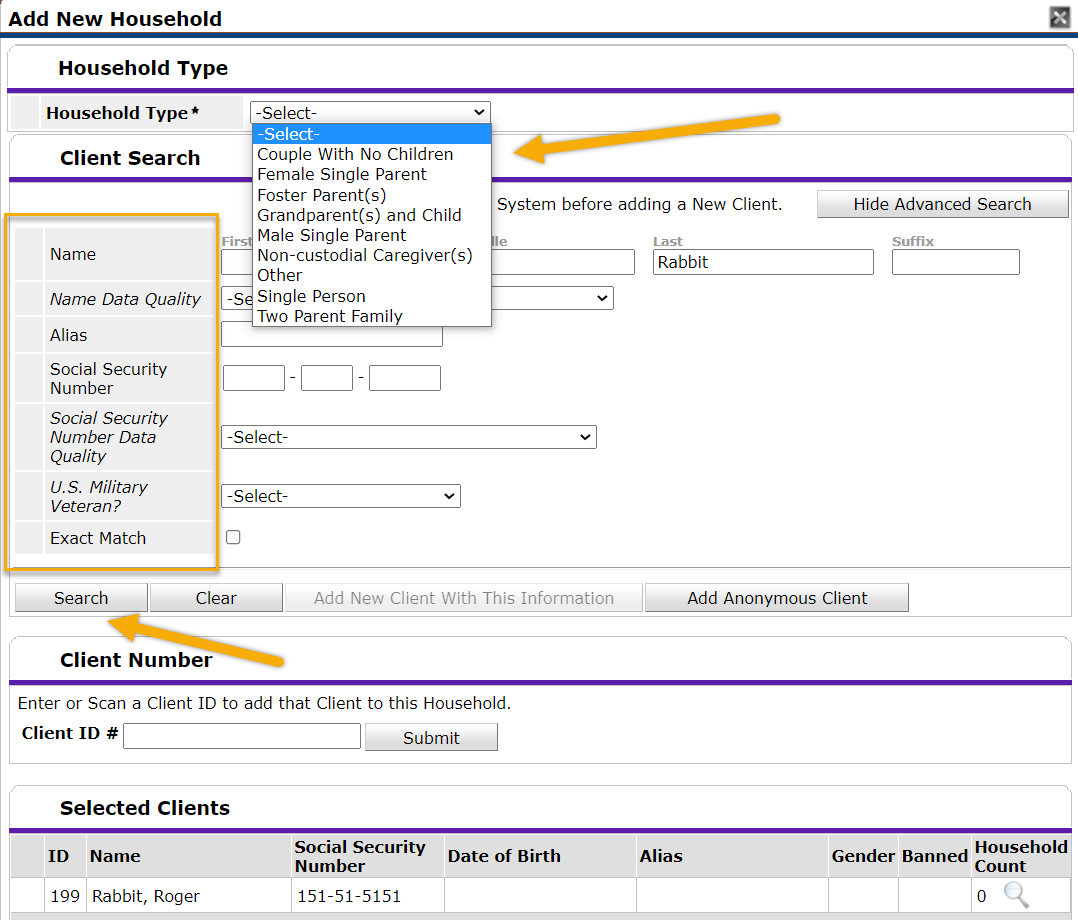
- Answer Household Type question
- Search and add all family members to household
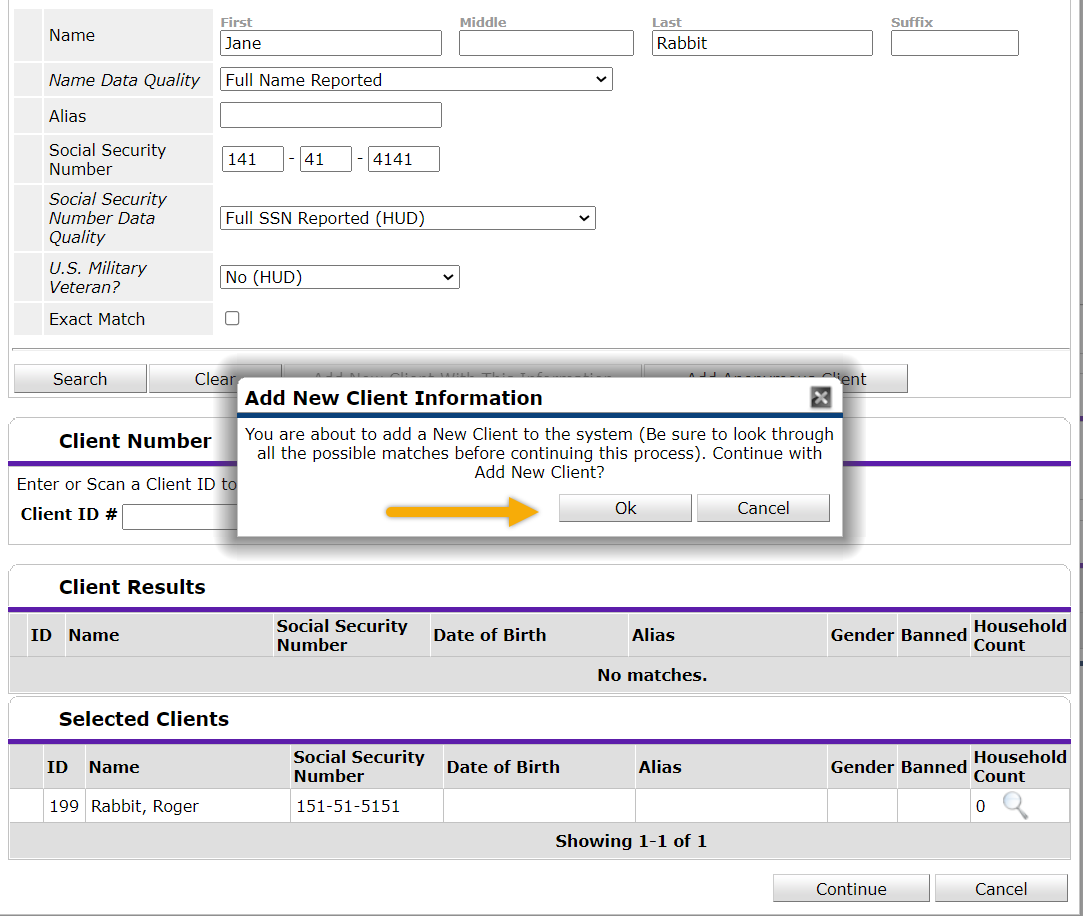
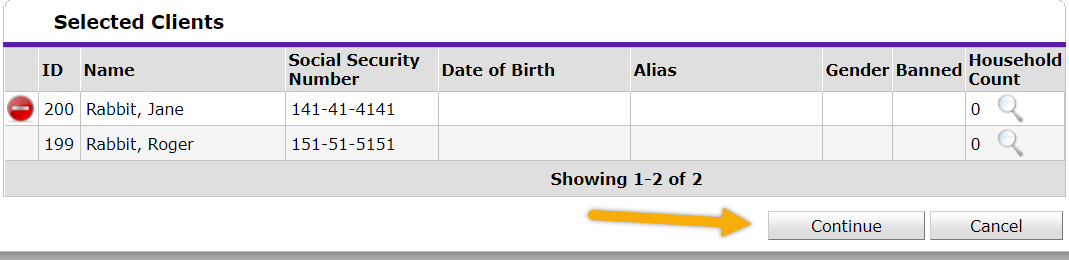
- Repeat the Search process for all household members. Once all family members appear in the Selected Clients table, click Continue
 7.
7.
Household Information
-
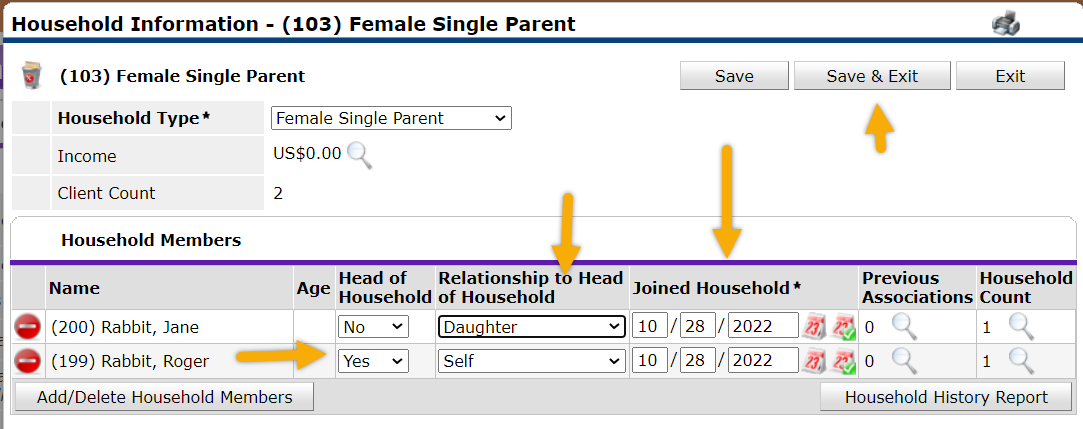
Select the Head of Household - there can only be one Head of Household selected no matter how many adults are in the household.
-
Indicate the Relationship to Head of Household for each person.
-
Joined Household - this date should be the same date as when the household entered the Shelter making sure all household members have the same date.
-
Save & Exit
-
You will return to the Client Search screen and the Head of Household will have a green plus sign by their name.
-
Click the green plus sign

-
This takes you to the Shelter Unit Entry Data
-
Date In - if this date needs to be changed - change it here. It should match the Joined Household date entered on the Household Information
-
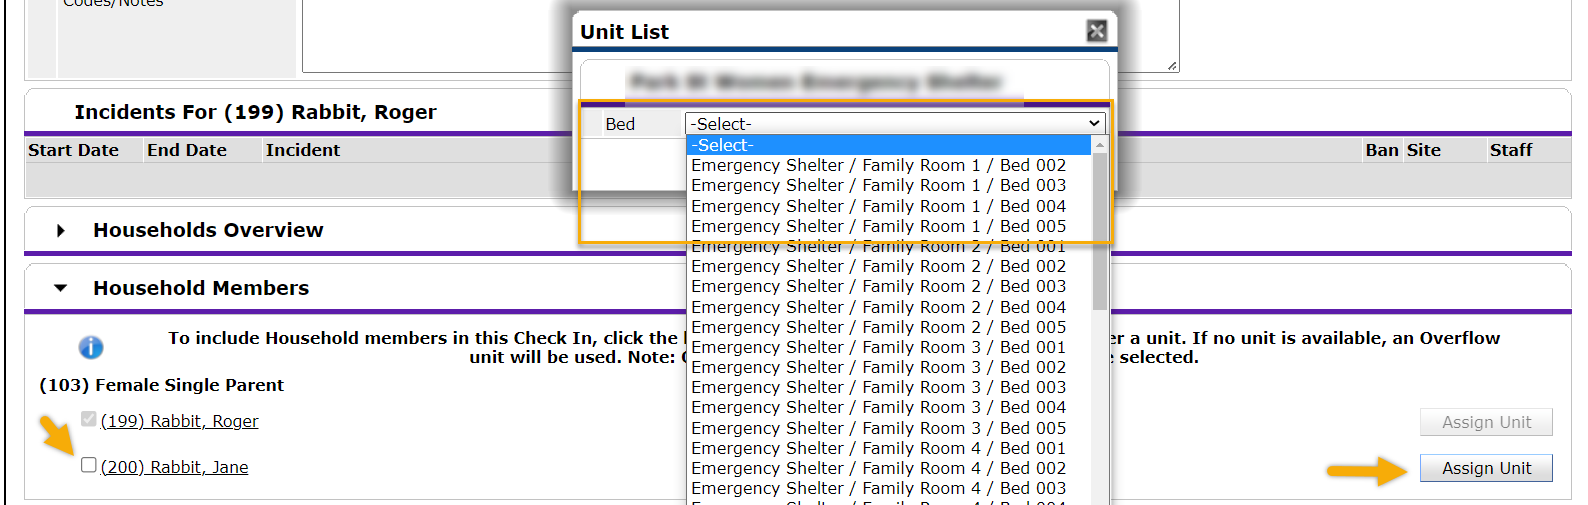
Check the box by all household members who are checking in
-
For each household member click the Assign Unit to assign - only beds that are not assigned will appear on the list
-
Click Select
 8.
8. Release of Information
-
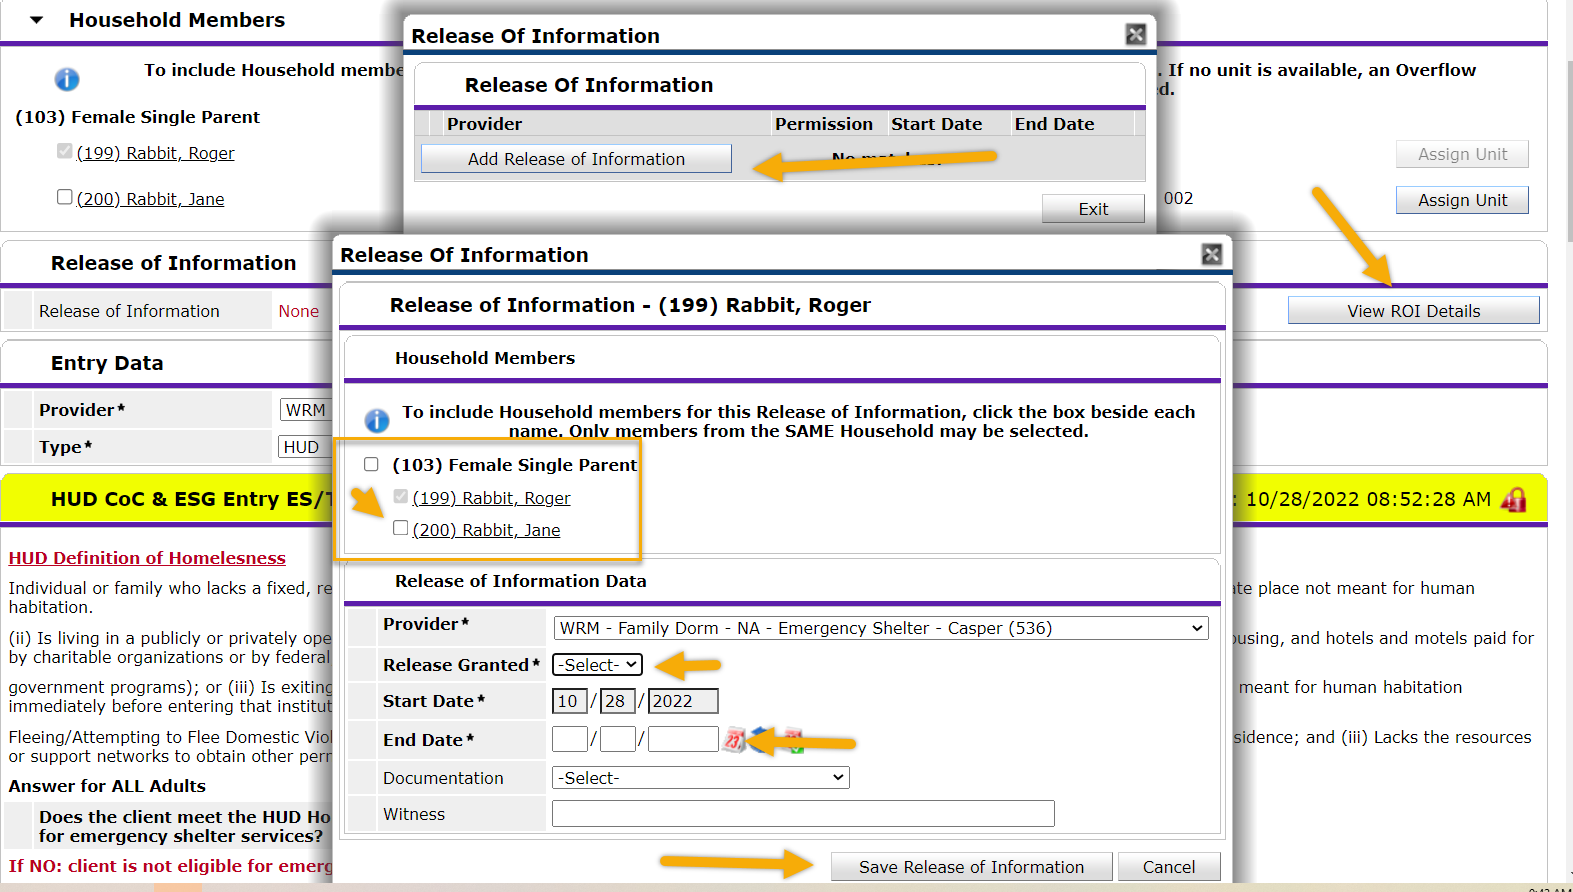
Click View ROI Details
-
Click box by all household members
-
Release Granted - Yes or No
-
End Date - one year from Start Date
-
Save Release of Information
-
Complete the assessment below the Release of Information for the Head of Household
-
Save & Exit
-
The clients will not be seen on the Unit List
-
Click on another household member and complete the assessment. Repeat for each household member.
-
HINT: a date of birth and gender will be filled in on the bed list for every client that has a completed assessment.
-
Group ID - this shows the clients that entered into the shelter together. All household members should have the same Group ID

 7.
7.
 8.
8. 
